Roofing installation is a significant home improvement project. It requires careful planning and preparation to ensure success.
This article aims to guide homeowners through the process of roofing installation preparation. It covers everything from selecting the right contractor to managing pets and children during the installation.
We’ll also delve into the importance of communication with your contractor and what to expect on installation day. Plus, we’ll discuss post-installation cleanup and final inspection.
Whether you’re a seasoned homeowner or a first-time buyer, this guide will equip you with the knowledge you need for a smooth and successful roofing installation.
Understanding the Roofing Installation Process
The roofing installation process begins with a thorough inspection of your existing roof. This helps identify any underlying issues that need to be addressed before the new roof is installed.

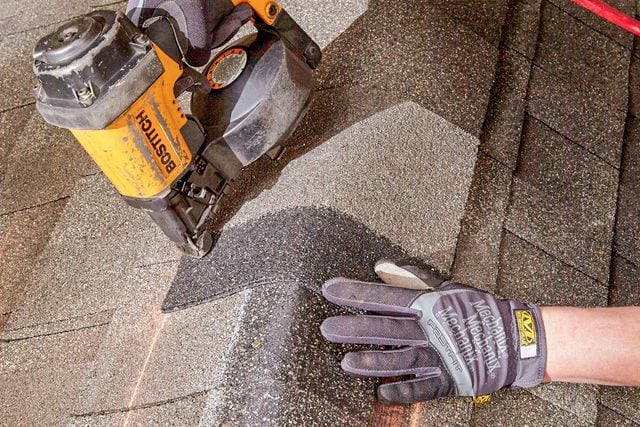
Next, the old roofing materials are removed, and the roof deck is prepared for the installation of the new materials. This prep work is crucial to ensure the longevity and performance of your new roof.
The new roofing materials are then installed, followed by the installation of flashing around chimneys, vents, and other roof penetrations. This step is vital to prevent water leaks and damage.
Finally, the cleanup process begins. This includes the removal of debris and leftover materials from your property. Understanding this process can help you better prepare for what lies ahead and ensure a smooth installation.
Selecting the Right Contractor
Choosing the right contractor for your roofing installation is a critical step. You want to ensure they are licensed, insured, and have a solid reputation for quality work.
Don’t hesitate to ask for references and check their past projects. This will give you a clear idea of their workmanship and reliability.
Remember, a good contractor will be transparent about their process, provide a detailed estimate, and answer all your questions. They should also offer a warranty for their work, giving you peace of mind about your investment.
Preparing Your Home’s Exterior
Before the roofing installation begins, you’ll need to prepare the exterior of your home. This involves clearing the area around your house to provide easy access for the contractors and their equipment.
Remove any outdoor furniture, grills, or decor that could be damaged during the installation process. Also, consider covering your plants and shrubs with a protective tarp to shield them from falling debris.
It’s also important to consider your home’s gutters. Ensure they are clean and in good condition before the installation begins. This will help prevent any water damage during the process.
Here’s a quick checklist to help you prepare your home’s exterior:
- Clear the area around your house
- Remove or cover outdoor furniture and decor
- Protect plants and shrubs with a tarp
- Clean and inspect your gutters
By taking these steps, you can help ensure a smooth and efficient roofing installation process.
Protecting Your Property and Landscaping
During the roofing installation process, debris and materials can fall from the roof. This can potentially damage your property and landscaping. To prevent this, take steps to protect these areas.
Consider using plywood or tarps to cover large items that can’t be moved. This includes things like air conditioning units and large garden features. Also, move smaller items like potted plants and garden tools to a safe distance from the work area.
By taking these precautions, you can minimize the risk of damage to your property and landscaping during the roofing installation process.
Preparing the Interior of Your Home
Roofing installation can cause vibrations that may affect the interior of your home. These vibrations can potentially knock loose items off shelves or walls. To prevent damage, remove any fragile items from walls and shelves before the installation begins.
Also, consider covering large furniture items and electronics with dust sheets. This can help protect them from dust and debris that may enter your home during the installation process.
Lastly, remember to secure loose items in your attic. The vibrations from the installation process can cause these items to move or fall, potentially causing damage or creating a safety hazard.
Safety Measures and Accessibility
Safety is a top priority during any roofing installation. Ensure that the work area is clear of any obstacles that could pose a risk to the workers. This includes toys, garden tools, or any other items that could cause accidents.
Accessibility is also crucial for a smooth installation process. Make sure that the contractors have clear access to the work site. This includes access for delivery trucks bringing in the roofing materials.
Lastly, maintain a safe distance from the work area during the installation. This is especially important if you have children or pets. It’s best to keep them indoors or in a separate part of your yard away from the work area.
Communicating with Your Contractor
Effective communication with your contractor is key to a successful roofing installation. Before the project starts, discuss all aspects of the job. This includes the timeline, materials, and any potential disruptions to your daily routine.
During the installation, stay in regular contact with your contractor. This will allow you to stay updated on the progress and address any issues that may arise. Remember, it’s better to ask questions and clarify doubts than to assume.
After the installation, ensure that all your concerns have been addressed. Discuss any follow-up work or maintenance that may be required. This will help you keep your new roof in top condition for years to come.
Managing Pets and Children During Installation
Roofing installation can be noisy and disruptive. It’s important to plan for the safety and comfort of your pets and children. Consider arranging for them to stay elsewhere during the most intense work periods.
Remember to keep pets and children away from the work area at all times. This ensures their safety and allows the workers to do their job without any distractions.
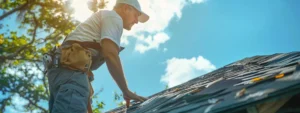
What to Expect on Installation Day
On the day of installation, your contractor will arrive with a team of workers. They will begin by setting up their equipment and preparing the site for work. This may involve removing the old roof, if necessary.
Throughout the day, there will be a lot of noise and activity. You can expect the process to be quite disruptive. However, a professional team will work efficiently to minimize the impact on your daily routine.
By the end of the day, the new roof should be installed. The team will then start cleaning up the site, ready for the final inspection.
Post-Installation: Cleanup and Final Inspection
Once the installation is complete, the cleanup process begins. The contractor’s team will remove all debris from your property. They will also use a magnetic sweeper to pick up any stray nails or metal pieces.
The final step in the roofing installation preparation is the inspection. Your contractor should conduct a thorough review of the work. This ensures that the installation meets all quality and safety standards.
Remember, the project isn’t truly complete until you’re satisfied with the work. Don’t hesitate to ask questions or raise concerns during the final walk-through. Your peace of mind is paramount.
For expert roofing services that prioritize your satisfaction, contact Aj Wells Roofing today at 904-553-0069 or visit ajwellsroofing.com